Making Of
The Making of Office Building
Hi everyone. My name is Maciej Józefiak and I would like to thank Jeff Mottle and CGarchitect for the opportunity to present my project "office building" in the Making Of series.
First of all, I would like to say something about the project. It is an office building, which I made a few years ago during my studies. Because I felt sentimental about this project, I decided to refresh the topic and to create a new image for this building.
Taking a bit aggressive and dynamic form into consideration, I've decided to present the picture as if a storm had just gone away and the sun begins to shine breaking through the clouds.
I will try to present the step by step creation of my visualisation. I hope you will enjoy it.
The scene was made in 3ds max with V-Ray. Post-production in Photoshop.
MODELING SCENE AND MAKING MATERIALS
Let's start from preparing reference materials.
Here we are going to use simple drawings from AutoCAD, which will be set in suitable dimensions.
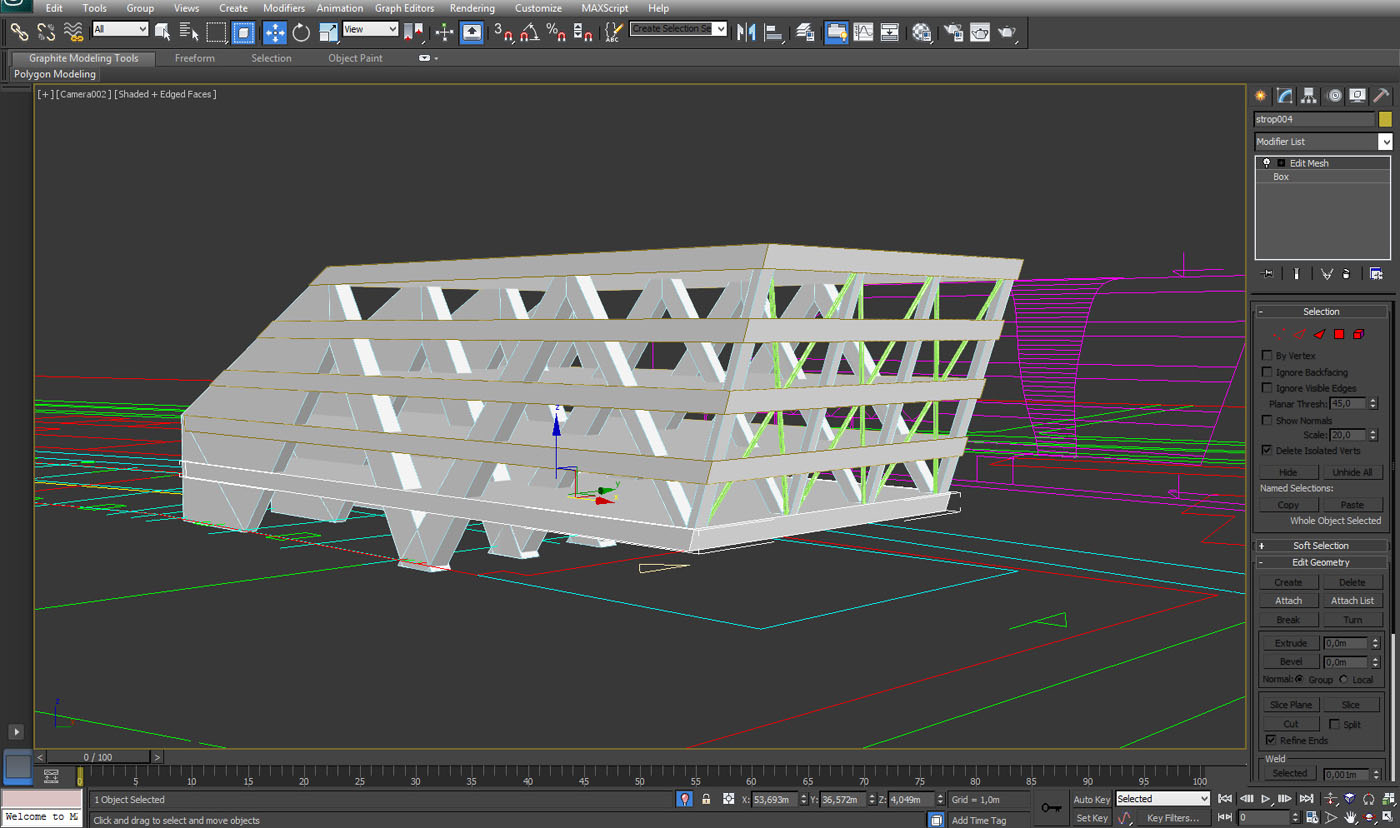
Next we will model specific levels of the object and the basic construction elements.
Here we are going into modelling the exterior form of the building.
When the body of the building are created and we've set the proper net divisions, we are going to separate the glass elements by marking the specific polygons.
Now we will separate the marked part with ‘DETACH’ option and we will get a separate element which will be our glass facade.
Now we are trying to make the division of the glass elements in an easy way. We are cloning it and using the LATTICE option in order to get the slight division of the second one and we add the glass material to the first one.
Now we will model the most important element of the elevation which are the shutters covering the whole object and giving it the expressive character.
We are going to put the same material on the shutters and the elevation.
Now we will specify the entrance of the building. We will build the corners and give it a concrete material.
We will put the door and the furniture, which we will be placing inside the hall using a proxy file.
As we can see the office space behind the glass facade, we have to equip it with elements such as desks, shelves, lamps etc. For this as well we use a proxy file.
Specific elements of our equipment will be placed next to the glass facade behind which they will be visible.
Now that we have finished the building itself. Let's go into modelling the surroundings. First we place the ground level where we place the parking area and the elements of exterior lights.
We will make a ground level material, which looks like a street after a heavy rain. For this we are using the concrete texture which was used to build the corners and the parking elements.
We will make reflection and bump textures.
Below are settings of the ground material with the textures prepared.
We will add some car models. Here I have used some Evermotion models.
LIGHTING AND CAMERA SETTINGS
To avoid the flat facade effect, we are adding several lights inside the building in order to see what's happening inside. As a result, the scene will be more spatial.
We are putting a few lights at the specific levels and inside the hall.
To light up the whole scene we are using an HDRI.
In general, the scene is already done and we only need to set the camera.
General settings
Raw render
POST-PRODUCTION
After rendering our scene, we will finally work it up using Photoshop.
Let’s start by finding the right background which will suit the mood of the picture.
We will complement the composition by adding some elements like people and birds.
We will add shadows, reflections and air perspective on the horizon.
The car on the right should be ‘moving’. For this we will use the ‘motion blur’ option.
In order to prepare the image as if it was after the storm, we will try to prepare an evaporating surface. I am using "Rons steam and smoke" brushes.
First I used background steam and next the horizon and building entrance.
Then we completed the rest of the view.
We added shining lights of some car lamps.
Within the next layer we will put the trails of the rain which has stopped raining.
Using Knoll Light Factory, we added the sunshine.
Also we are adding shines in places where the sun is supposed to reflect.
Finally, we set the right colour balance and contrast.
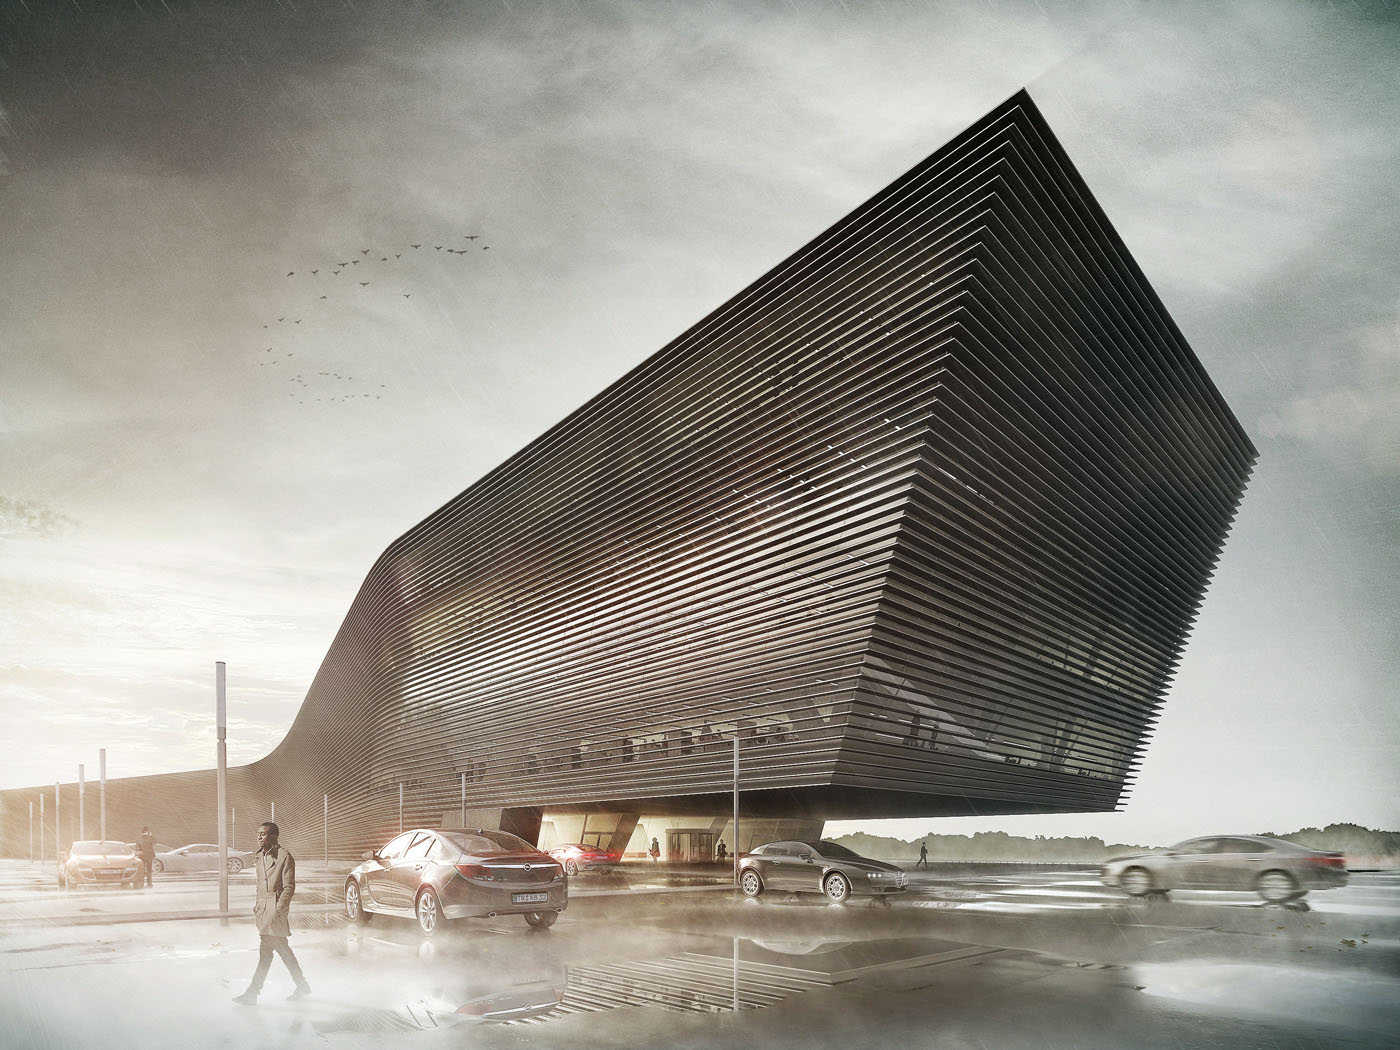
This is how the final vizualisation looks.
I hope the presented progress of my work on this picture is clear for you and will be helpful.


About this article
Making Of office building by Maciej Józefiak


